Hang a Picture FrameCheck out the link to see all of the steps. You will be hanging pictures like a pro in no time.
Here is my method for measuring and hanging framed pictures. Your art will end up at the correct viewing height and will be even with other frames in the room, even if they are different sizes. This is my own preferred method; there are others, like some folks will hang pictures with the tops or bottoms at the same height; others so that the middles are all level. My method places the two-thirds point uniformly at eye level, which I think looks best....
step 6 Make a sketch
On a piece of paper make a diagram (this helps me). Make these calculations:
Take frame height ( H ), divide by three. This is ( E )
Measured down from the top of the frame, ( E ) is going to end up being eye level ( L, or 66" ), two thirds up the frame.
The difference between the 66 inch mark and where the hanger will go is ( D ).
Picture hanger is placed at ( X ).
So we have:
H divided by 3 = E ( Thirds )
E minus V = D ( Difference between wire and top third point )
66 plus D = X ( Eye level plus difference is where the hanger goes )
V corresponds to X ( The wire hangs on the hanger. Duh. )
It gets easier when you've done it once or twice.
(Tell me if I've made this stupidly complicated.)
Showing posts with label decorating. Show all posts
Showing posts with label decorating. Show all posts
Friday, March 20, 2009
How to hang a picture frame
For many hanging picture frames can be a frustrating and daunting task. There are several methods to achieve the look you would like for your decor. This one posted on Instructables takes in to consideration the average eye level of most viewers, and then uses that magical number 66" from the floor to find the sweet spot on where to hang your nail. There is some other math involved too, but we will let them explain.

Wednesday, October 15, 2008
Custom wall coverings make a big impact
Savvy designers are discovering the potential in custom wall coverings. Not only for corporate users, but also for home decor. The versatility of the product combined with the designer's vision make the possibilities endless.
 This wall covering was designed by LA Digital Graphics for a Paul Mitchell salon studio in San Francisco. They used a self adhesive vinyl product for this installation.
Digital wallpaper also offers the same freedom for customization. Designers are able to work directly with their client to create a one of a kind setting that is unique to their taste.
Excerpt from the November issue of Digital Graphics magazine article by Sharla Sikes

Why Not Wallpaper?
Digitally printed wall coverings offer a lot of advantages over traditional wallpaper, which helps to drive their growing popularity.
"You can offer short-run customization without the huge expense of setup. Machine printing is extremely expensive in that world, and they have to do larger runs. It's more cost effective to do it digitally. With new technology we now have permanent inks and eco-friendly products - that's a big thing now," says Kirsh...[Aaron Kirsch of Aztek Wallcoverings Inc. uses a UV curable printer similar to ours at Mighty Imaging.]
Traditional wallpaper is more limited in terms of design. With digitally produced murals or wall coverings, the customer and designer can work together to create not just a design but an environment that reflects the look and feel the customer wants.
Monday, July 28, 2008
Printable privacy window films
 LexJet recently introduced a new line of window films that can be used in all types of commercial and private home design applications. The film allows light to pass through, but the texture of the material provides privacy. They developed three distinct looks, from a three-dimensional stained glass look, to a pebbled matte texture, to rice paper, they have a look that will fit your decor.
LexJet Introduces Printable Décor & Privacy Window Films
The new SUV-compatible window film line includes Glacier, Velvet, and Rice Paper Window Films. Each film was specially-developed based on customer requests for a window imaging solution that can be used in a wide range of environments, from residential to high-end commercial, retail, and corporate décor.
"We used LexJet Rice Paper in a custom showcase home and it generated a great deal of interest from people touring the home," says Lance Licciardi, Licciardi Design, Sarasota, Fla. "I plan to use the printable privacy window films in future projects because they allow me to create a range of custom window effects without having to specify costly custom glass."
Contact us for more details if you are interested in using this unique material for your next project.
Friday, July 25, 2008
Using the power of 9 to create wall art

Sets of 3 image repeated or grouped together is a common theme in decorating and art. When you multiply that by 3 you get the power of 9. A set of 9 images can really make a big impact on a room. If you have a large wall and are unsure what to do to bring it to life, consider using this decorating rule to create an art installation that will accentuate your space and make a bold statement.
Using the Power of Nine to Decorate: Blissfully Domestic
Much has been said in the decorating world about the power of three. Repeating an element three times is very effective. I love three so much that I often find myself decorating in three to the third power. I love nine!
Why nine?1. Today's homes often have vast amount of wall space.
Many of the homes constructed in the last 15 years have large walls. Often these walls extend up 1 1/2 to 2 stories. That is a lot of wall space. Placing a picture or a series of three pictures on a vast wall can dwarf the artwork or arrangement.
Friday, June 27, 2008
Write your name with pictures
This is real cute and creative way to make a wall art piece that is all about you. This would be great for a kid's bedroom or playroom. No need to limit it to just a name. Spell out any word to fit the area you are designing.
Creative Wall Art: Your Name in Pictures: Design Talk
Here’s a creative idea for your walls that displays a name in a unique and artistic way. Because a picture (or 10 pictures, in our case) is worth a thousand words, why don’t we just show you the example first:What we did. We chose photos of each of the letters in “DesignTalk,” then framed and hung them together to make a personalized photo arrangement.
How we did it. You can go so many directions with this idea. For example:Pick your word:
- a family last name for a living room, kitchen, or entryway
- a child’s name for a bedroom
- a teen’s nickname for a teen room
- a word to coordinate with a theme room (for example, “kick” for a soccer room, “fashion” for a fashion bedroom, “princess” for a little girl’s room, etc.)
- a sports team name for a basement, den, or game room (choose pictures from sports venues to complete the look)
- a business name for an office
- an inspirational word for a home office, home gym, homeschool room, or classroom
Pick your photos:
- Take your own pictures of shapes around your home or town that form the letters in your name (see an example here).
- Enlist your children to help you seek out letters they like to create a name for their room.
- Visit a photo site like istockphoto to search out photos in colors or themes you’re looking for.
Print your photos:
Use your favorite photo printer [We are assuming this means Mighty Imaging] to order the photos in the sizes you’re looking for. If you have the wall space, an easy arrangement would be to order 8×10″ photos and hang them in coordinating frames.

Monday, June 23, 2008
Creating custom repeating patterns

PS Hero is a site dedicated to Photoshop tutorials. In this tutorial they give a simple step by step on how to create your own custom repeating pattern by using the Custom Shape Tool. If you would like more choices than what is standard in Photoshop, they even have links posted for free custom shapes available for download.
Although the tutorial was not written with this in mind, we thought another great use of this technique would be to create your own wallpaper design for your home, office, or studio. The possibilities are endless, and what a great way to add a subtle touch and personalize your space.
Creating Custom Patterns
In this Photoshop tutorial we will explore the wonderful world of repeating patterns while creating one from scratch using a Photoshop Custom Shape.

Tuesday, February 26, 2008
Liven up your walls
 We are very excited about the new services we can now offer with our U/V curable roll to roll / rigid hybrid printer. One of them being wallpaper. It is a perfect marriage of cutting edge technology and design. Imagine creating your own wallpaper design for your home. Or take an image of your favorite locale and turn a wall of your home in to a tropical paradise. The possibilities are endless. USA Today's Weekend magazine agrees.
3 great ways to liven up your walls: by Megan Kaplan
Check out these solutions to take "wallpaper" to a whole new level.
Until recently, wallpaper was a bit of a wallflower in the world of interiors. Paint -- available in an array of colors and decorative finishes -- had all but pushed it aside. "We were wallpaper-starved," says Thom Filicia, New York City designer and host of "Dress My Nest." "And now we're a little obsessed. The idea of bringing interest back to our walls is undergoing a real renaissance." The upshot: wall coverings that are more sophisticated, less difficult to work with and cheaper than ever. So long, fusty cabbage roses!
"Wallpaper has finally caught up with people toady who want to express their creativity without destroying their walls," says Sharon Hanby-Robie, the spokeswoman for the Wallpaper Council and author of "Decorating Without Fear." Decals, digital photo murals and 3-D applications are the trends leading the way....
--LARGER-THAN-LIFE MURALS
Innovations in digital technology and printing have taken the mural to new heights -- literally. "We are not restrained by that 27 1/2-inch roll size anymore," Hanby-Robie says. "You can have an image blown up 19 feet high to cover an entire wall." Even better, the oversize options are virtually endless.
Friday, December 07, 2007
Painted glass photo mat
 This is a great way to add a personal touch to your artwork for yourself, or as a gift. You can use items that you may already have laying around the house. Nothing too out of the ordinary that a quick trip to an art supply store couldn't take care of. Instructables is a great site full of these kinds of useful ideas. You may need to sign up as a member to see all the steps.
Painted Glass Photo Mat
Create a great looking Photo Mat, without cutting Mat Board, or requiring any special tools.
Materials Needed
Here's the list of materials needed for this Instructable:
- A Photo to Frame (any size you wish)
- Picture Frame (with glass, precut photo mat not required)
--- NOTE: The picture frame MUST be at least 2-3 inches larger in all directions than the photo you are planning to put into this frame. The extra area will provide the space for you to paint, while still allowing your photo to be fully viewed.
- Acrylic Paint (buy individual paint tubes, or a set of many colors)
- Paint Brushes for Acrylic Paints (in whatever sizes/design you prefer)
- Poster board (or large piece of cardboard)
Misc items from around the house:
- Ruler
- Pen/Pencil
- Double-sided tape
- Scissors
Monday, November 05, 2007
No more naked walls!
Naked? Bueno! Naked walls? No bueno!
As you know we here at Mighty Imaging love BIG PRINTS. We love making photographs in to really large (huge) prints of astounding sharpness and clarity. With that in mind, we set about the mission of dressing up one of our favorite customers.
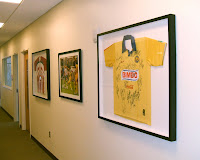 Global Spectrum; a leader in sports, entertainment, and facility management, is in charge of operations for the award winning state of the art University of Phoenix stadium. Like many things in the Vally of the Sun, the stadium is brand spanking new. That means that Global's offices were nothing but naked walls. The first thing that we thought of was what a great place for large images. Just imagine how cool a bunch of big prints custom framed would look. Since everybody from the Arizona Cardinals of the NFL to the Rolling Stones have played there, how about tying it in to a theme of the company and the events that take place? Talk about inspiring interest!
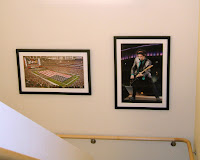
Making a great first impression is always a good idea, and these exciting and vibrant event images make the office look fun and creative. Not only do our prints tell the Global Spectrum story to their customers, but it also creates a strong statement and fun work environment for their own people as well.
If your company's walls need to get dressed up here are a few ideas. First pick a theme, whatever you think will make the statement that you want. Not only will this unify the look of the images on the walls, but it will also unify the workplace. You could hire a photographer and have them find quirky abstract shots around the company plant or office. Then make huge prints that would attract attention by being familiar, yet not so easily recognized. Another idea is to collect a group of snapshots from the company picnic or holiday party and make a collage out of them. Your 30x40 lobby print can show that your company is proud of its employees and that you are a close team of workers.
Either way, the walls of your business should never be bare, so let's dare to dress them up!
As you know we here at Mighty Imaging love BIG PRINTS. We love making photographs in to really large (huge) prints of astounding sharpness and clarity. With that in mind, we set about the mission of dressing up one of our favorite customers.
 Global Spectrum; a leader in sports, entertainment, and facility management, is in charge of operations for the award winning state of the art University of Phoenix stadium. Like many things in the Vally of the Sun, the stadium is brand spanking new. That means that Global's offices were nothing but naked walls. The first thing that we thought of was what a great place for large images. Just imagine how cool a bunch of big prints custom framed would look. Since everybody from the Arizona Cardinals of the NFL to the Rolling Stones have played there, how about tying it in to a theme of the company and the events that take place? Talk about inspiring interest!
Making a great first impression is always a good idea, and these exciting and vibrant event images make the office look fun and creative. Not only do our prints tell the Global Spectrum story to their customers, but it also creates a strong statement and fun work environment for their own people as well.
If your company's walls need to get dressed up here are a few ideas. First pick a theme, whatever you think will make the statement that you want. Not only will this unify the look of the images on the walls, but it will also unify the workplace. You could hire a photographer and have them find quirky abstract shots around the company plant or office. Then make huge prints that would attract attention by being familiar, yet not so easily recognized. Another idea is to collect a group of snapshots from the company picnic or holiday party and make a collage out of them. Your 30x40 lobby print can show that your company is proud of its employees and that you are a close team of workers.
Either way, the walls of your business should never be bare, so let's dare to dress them up!
Tuesday, September 18, 2007
Art + Faucetry = Accessible Sculpture

This has to be one of the most creative pairings of function and fine art I have seen. Desiree Edkins has teamed up with The Studio at Central Arizona Supply to feature her photography with their Brizo faucets. There is an opening reception September 20th at 6 PM. It is wonderful to see the parallel inspiration of photography and design showcased in such a unique way.
Accessible Sculpture:
From the people who brought the world; The Faucet Fashion Show comes Accessible Sculpture, a look at faucetry through the eyes of artistry. We will be pairing the photography of Desiree Edkins with the faucets of Brizo. There will also be a pairing of wine with each collection. The Studio at Central Arizona Supply is excited to invite you to take a look at how art can not only imitate, but be active in life.
Wednesday, July 18, 2007
Tips for making your room look bigger
 It is a topic that brings a lot of visitors to our blog... How to decorate a room so that it looks bigger? Many of the articles written by interior designers agree. Instead of cramming several smaller items in to an arrangement, use one large piece as your focal point on the wall. Freshome uses this and other suggestions on how to making the room look more spacious.
5 Tips for Fooling the Eye and Making a Room Look Bigger:
“In a small space, everything counts.” - That’s the main idea behind this article, and how we can make a small room look bigger, with some clever tricks.
Small rooms can feel confining and uncomfortable. Luckily we can utilize certain design concepts that fool the eye and make our rooms seem much bigger and spacious.
#4 Cut the Clutter
...Don’t cover your walls with a lot of pictures. One large painting [or photograph] works better than a group of small paintings. If there’s too much going on, all clamoring for attention, it can make the room feel busy and crowded. So, when decorating a small room, create a focal point, one area or feature that will draw the eye.
Thursday, July 12, 2007
Personalized music poster
This would be a great gift idea for any music lover. Or just a cool way to make a personal statement using your favorite bands as the backdrop. We would be happy to print it, of course.
Make a huge printable poster from your iTunes album art!
This is a instructable describing how to cumbersomely export your existing iTunes album art and arrange all the covers into a huge grid, leaving you with a gigantic, colourful and vibrant mishmash of popular culture ready for printing and, maybe later, your wall!
I decided I wanted to do this a couple of nights ago and now I've come up with a method, it's not really complicated but can be rather time-consuming depending on how large your library is.
I have around 800 albums with attached album art and it took at least an hour, granted most of that time is spent watching your computer doing all the work for you.
The process requires you to download some free applications (links supplied) and you also need a new-ish version of Photoshop (I use CS3) although I'll show you an alternate way of getting basically the same results with Google's free digital photo organizer, Picasa2.

Friday, June 29, 2007
Step up
 Creating any wall arrangement can be a quite a project. Adding an angle on top of it makes it even more of a challenge. Better Home and Gardens has some great tips on how to make a knock out photo gallery for your stairway. Taping up paper templates first to confirm your arrangement can save your walls from unnecessary holes.
Tips for Creating a Stairway Photo Gallery:
Think of a place in your house that you and your family pass by several times each day. That is the perfect place for family photos: Everyone in the household will have the opportunity to enjoy the montage as they move through the space.
...Before hanging pictures, consider the lighting. If the stairs are dark, add overhead spotlights on a track. That will not only improve the view, it will make the stairs safer.
A montage like the one shown here allows a lot of flexibility. Pictures from different times, in a variety of sizes, and in various frames can work together because of their family ties. Yet you'll get a more cohesive look by keeping the mat and frame colors in a similar range.

Monday, June 11, 2007
Shades of Grey
 Looking for a new decor theme that will impress? Why not try black and white photography? It made an impression on Sara Denning who wrote the article below. She leads by describing a home that made such an impact on her that it inspired her to write the article.
Black and White Art on Your Wall: by Sara Denning
Add drama and sophistication to your home! Years ago I attended a party that took place in a Deco style stucco house that I will never forget. It represented the height of sophistication from that period of decorating style. As I entered the front door, I was struck with the low lit interior and the boldly striped wall paper. The living room was all beige with white accents. The dining room walls were terracotta and a classic Greek keystone pattern ran around the bottom of glossy black crown molding. Throughout the house were at least a dozen black and white photos of architectural buildings and etchings. Obviously I was impressed. Any moment Humphrey Bogart and Lauren Bacall could have walked through the door!
You might not be ready for something quite this dramatic. However, the look of black and white art on a wall can make a highly sophisticated statement. When you are shopping for black and white images, keep in mind the main elements that viewers notice are line and mass. You can select highly distinctive pieces with bold lines and large mass shapes. Many images will have grey tones throughout and these will help soften the overall look.The size of the image will determine the level of intrigue that the viewer experiences. For example, a series of small images will invite closer inspection and a single large image will increase the power of the subject.
We have several artist in our For Sale Gallery that feature black and white work; Ray Lusson, Mark Culbertson, Art Holeman, Kevin Dyer, Christine Taft, and Reflections Photography (who's image is displayed above) just to name a few. All of them are reasonably priced and ready to add to your new look.
Friday, May 18, 2007
Digital photography as wallpaper
 What a great way to jazz up a room! This one is designed for a child's bedroom and they wisely finished it with latex to prevent any crayon or other kid related additions to the artwork. Why not use a similar idea for a master bedroom? You could cover one wall with a serene nature scene and wake up every morning in your favorite locale. The right image it could be a fantastic accent wall in a living room or dining room as well.
He also has an excellent way to solve the low resolution problem when trying to take digital files larger than they are meant to go. He changed it to a vector file using Illustrator CS2. Thanks to Lifehacker for the find!
Geekdad: Large Format Printing as Wallpaper
Last year, we decided to redecorate our kids’ rooms. We stumbled across the idea of “large format digital printing” while researching ideas for wall coverings. It seems print houses have discovered another use for the large format: turning photographs into wallpaper for your home. Dizzy with ideas for a photo-based wall, we decided to create some custom wallpaper for my son’s room.
... He and I love to watch Formula One together, so we decided to use some photos I had taken the last time I attended the U.S. Grand Prix. A little Photoshop work made the image more interesting, but I had a problem. Even using a plugin to blow up the photo, it was only half of the resolution I needed to fill the whole wall. The solution was found in Illustrator’s Live Trace feature (links to .pdf). With a little finesse, the photo was transformed into a scalable vector file.
Thursday, May 03, 2007
Graffiti your walls
Curbly is a very active community site where you can post pictures and ideas on DIY projects, get inspiration and advise from other creative people, designers, and the like. If you have not visited it yet, you should. That is where I found this great idea for using graffiti to decorate your home wall space. By selecting close up sections you can abstract the colors and textures that will compliment your decor.
Graffitti Artists Work = Contributers to My Home's Art:
I'm on a budget. My home is important to me. Art is important to me. When you throw these things together, walk into my apartment, and check out whats hanging on the walls, you see the results of artwork on a budget. Most of the pieces are my own work. I wish I didn't have to resort to my hanging so much of my own work, but dang it's easy on the budget.
One day I realized that I could use someone else's graffitti as sweet color-infused art in my home. I grabbed my digital camera and shot about 45 pictures of the least offensive (although if offensive grabs you, by all means, go with it) graffitti I could find. I then printed some of my favorites, put them in affordable frames, and organized them in coordinated groupings. It's cheap, not labor intensive, and happens to be a fun scavenger hunt activity.

Tuesday, April 17, 2007
Yes, but how will it look on the wall?

Many photographer's have run across this question from their clients. They love the image and want to buy it, but can not visualize how it will look in their office or living room. Google provides some very useful software that might be able to help you out. SketchUp is a free download and will allow you to build 3 dimensional models of nearly any environment. If you can imagine it, you can draw it out here. There are thousands of models (trees, window frames, sofas, TV's, tables, and so on) available for download and textures and patterns you can apply that will help you make the mock up look more realistic. You can set the parameters of the room to be exactly the same size as their space. You can zoom in and out and view the room in a 360 degree radius.
The software is pretty easy to navigate. If you can use Photoshop, you will be able to use SketchUp. I made this mock up pretty easily never using the software until today.
Wow your clients and use SketchUp on your next print project. It could make the difference between them ordering a 20x24 or a 30x50.
Thanks to Greg Hunter for the tip and Diego Ceja for the image!
Wednesday, March 07, 2007
Leave 'em hanging
 Do you have a blank wall that could use a new look? Or maybe you just need to freshen up your current art arrangement. This article from HGTV can help you out, or give you some inspiration to try a new design.
Designing and Hanging an Art Collage
First, pull together items that have something in common. All-gold frames with black-and-white images would tie unlike subject matter together. Then, add a couple items with some dimension, like a gold wall sconce with a candle on it, or a gold framed mirror. Don't overdo the variety so that the common thread of the grouping is lost.
Once the items have been collected, start arranging them in a space equal to the space available on the wall, but working on the floor. It's very easy to move things around and get a feel for the overall effect when you can work in an open area on the floor.
Now, how does the collage get from floor to wall? Just grab a couple of brown paper grocery bags, a pencil and a pair of scissors...
Tuesday, January 30, 2007
Hung out to dry
This unique way of displaying your art reminds me of the old dark room days of hanging your prints up to dry. I know that clients of ours have done similar installations where they have tension mounted wire from wall to wall and hung prints mounted on plexiglas or sandwiched in glass from the wire like a trapeze. Since I don't have pictures to share of that (Hint, hint, to our photog's), this write up from HGTV is the best way I have found to illustrate the effect.
 Display art and photos on a wall with clothesline. Attach a length of rope to a long bare wall, select your favorite photos, postcards, prints or artwork and clip to the clothesline.
 Display art and photos on a wall with clothesline. Attach a length of rope to a long bare wall, select your favorite photos, postcards, prints or artwork and clip to the clothesline.
Tuesday, December 26, 2006
Redecorate a room in '07
The new year is quickly coming upon us. Many of us take this time for renewal, making resolutions for the coming year, or other changes in our environment. How about redecorating a room? iVillage which is always a good resource for tips and ideas on how to get started on a project like this has an article 8 Decorating Rules to Try -- and 8 to Trash. I am glad one of them made it to their 'try' category.
Rule #7: Try to stage a surprise
An element of the unexpected will do wonders for your decor ‑- an oversized picture, a shelf hung lower than usual, a red pillow in a green room, a teacup turned on its side, a wall of family portraits. The backyard and patio areas are great places for surprises. Don't be afraid to do the unusual.
Subscribe to:
Posts (Atom)